
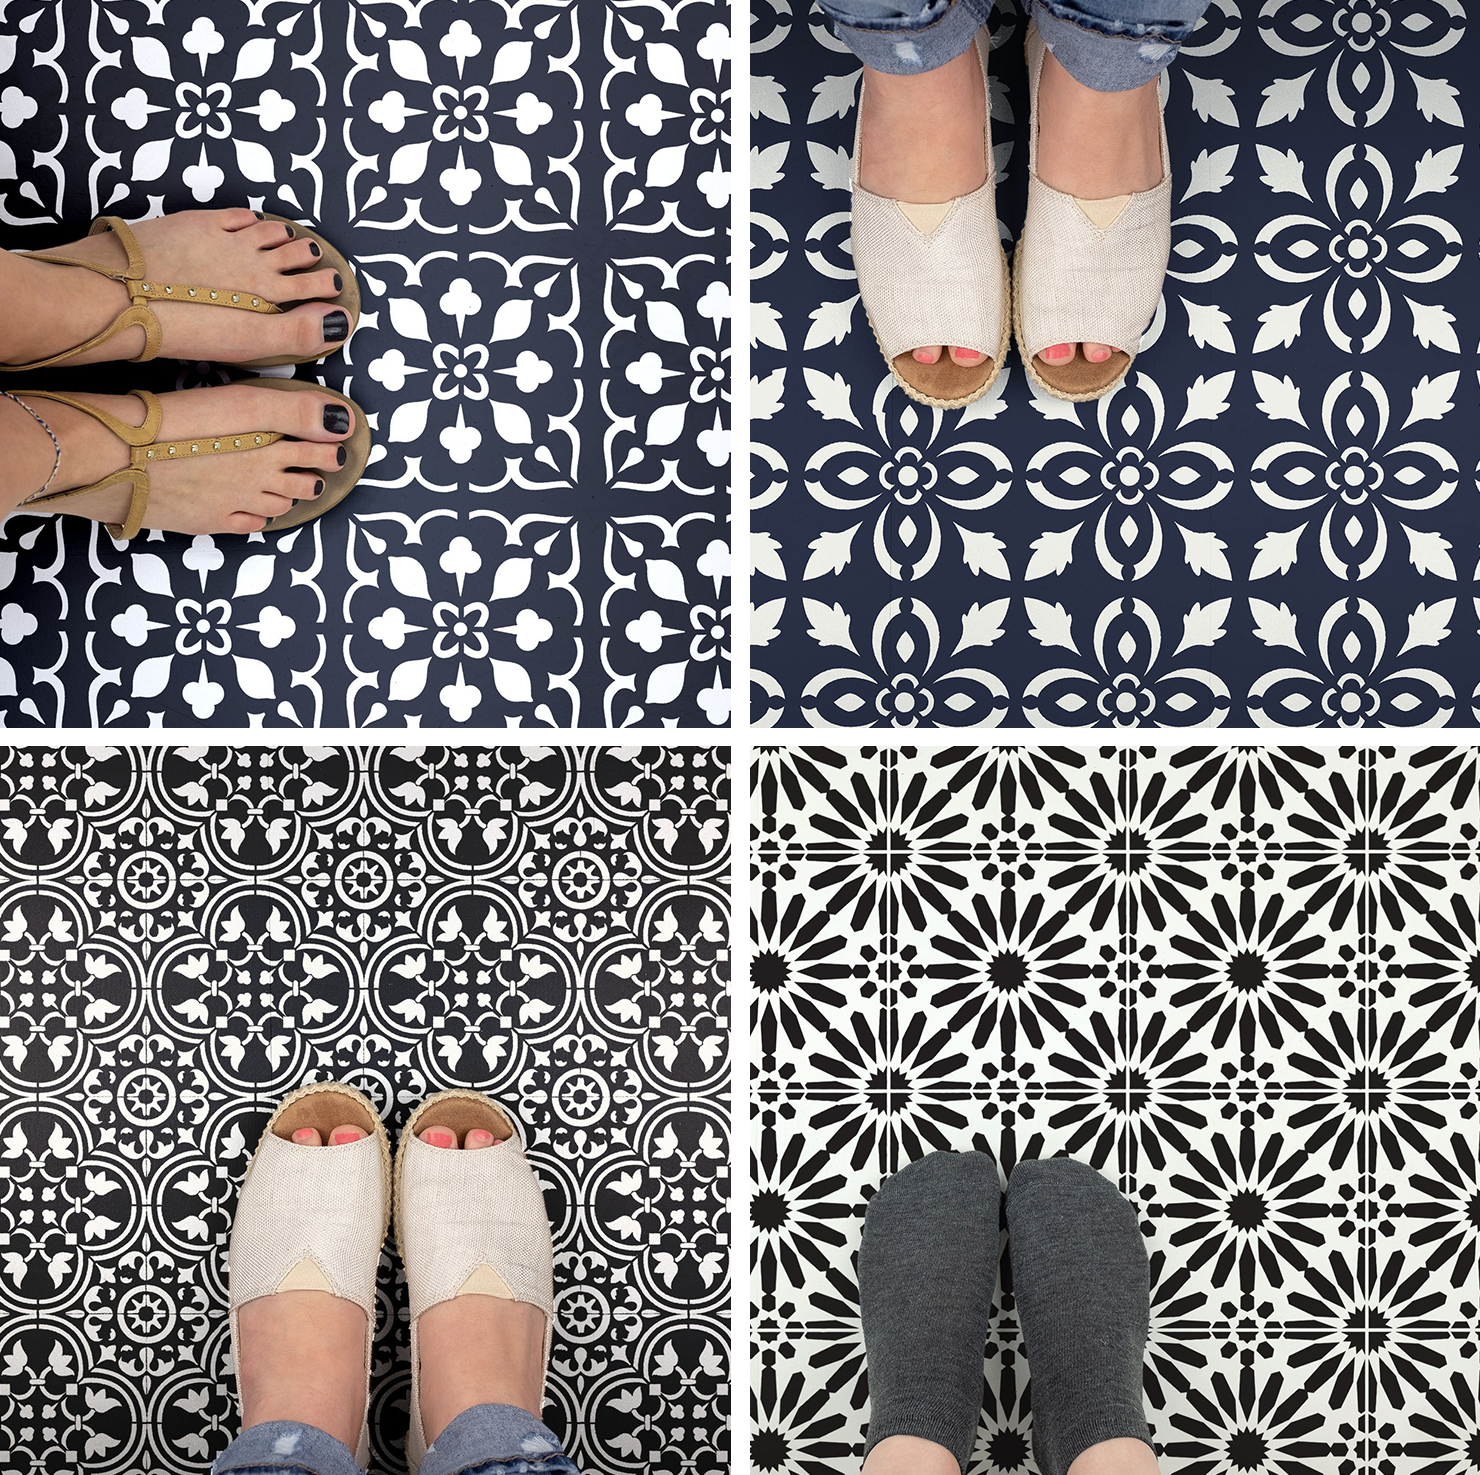
How to stencil Floor Tiles
One question we get asked a lot is how the sizing works for our tile stencils. So, we dedicated this entire post to this popular question.
Ready?
Here we go.
The listing size for our tile stencils represents the overall size of the main tile design, minus the registration marks (more about that soon). In other words, the size on the listing is the size of tile the design will fit.
We have seven sizes available (currently):
- 4x4 tile
- 5x5 tile
- 6x6 tile
- 8x8 tile
- 10x10 tile
- 12x12 tile
- 16x16 tile
Let’s dig in and see what that looks like.
Tile repeats have two sections, the main design and built in repeat guides

We will use the 4x4 inch Japanese Tile stencil as an example.
The image on the right highlights the main tile design, and the size of the design is 4 x 4. And on the right is the registration mark which overlap on the adjacent tiles as registration mark. All Stencil Revolution stencils have built in registration marks which are guides to line up the repeat pattern. If you aren’t familiar with what registration marks are, or how to identify these marks, you can read our post How to Stencil a Repeat Pattern and find out how to identify and use these marks.
Now that you know which area is the main design and which part is the registration mark...
Let's have some fun and virtually paint some tile.
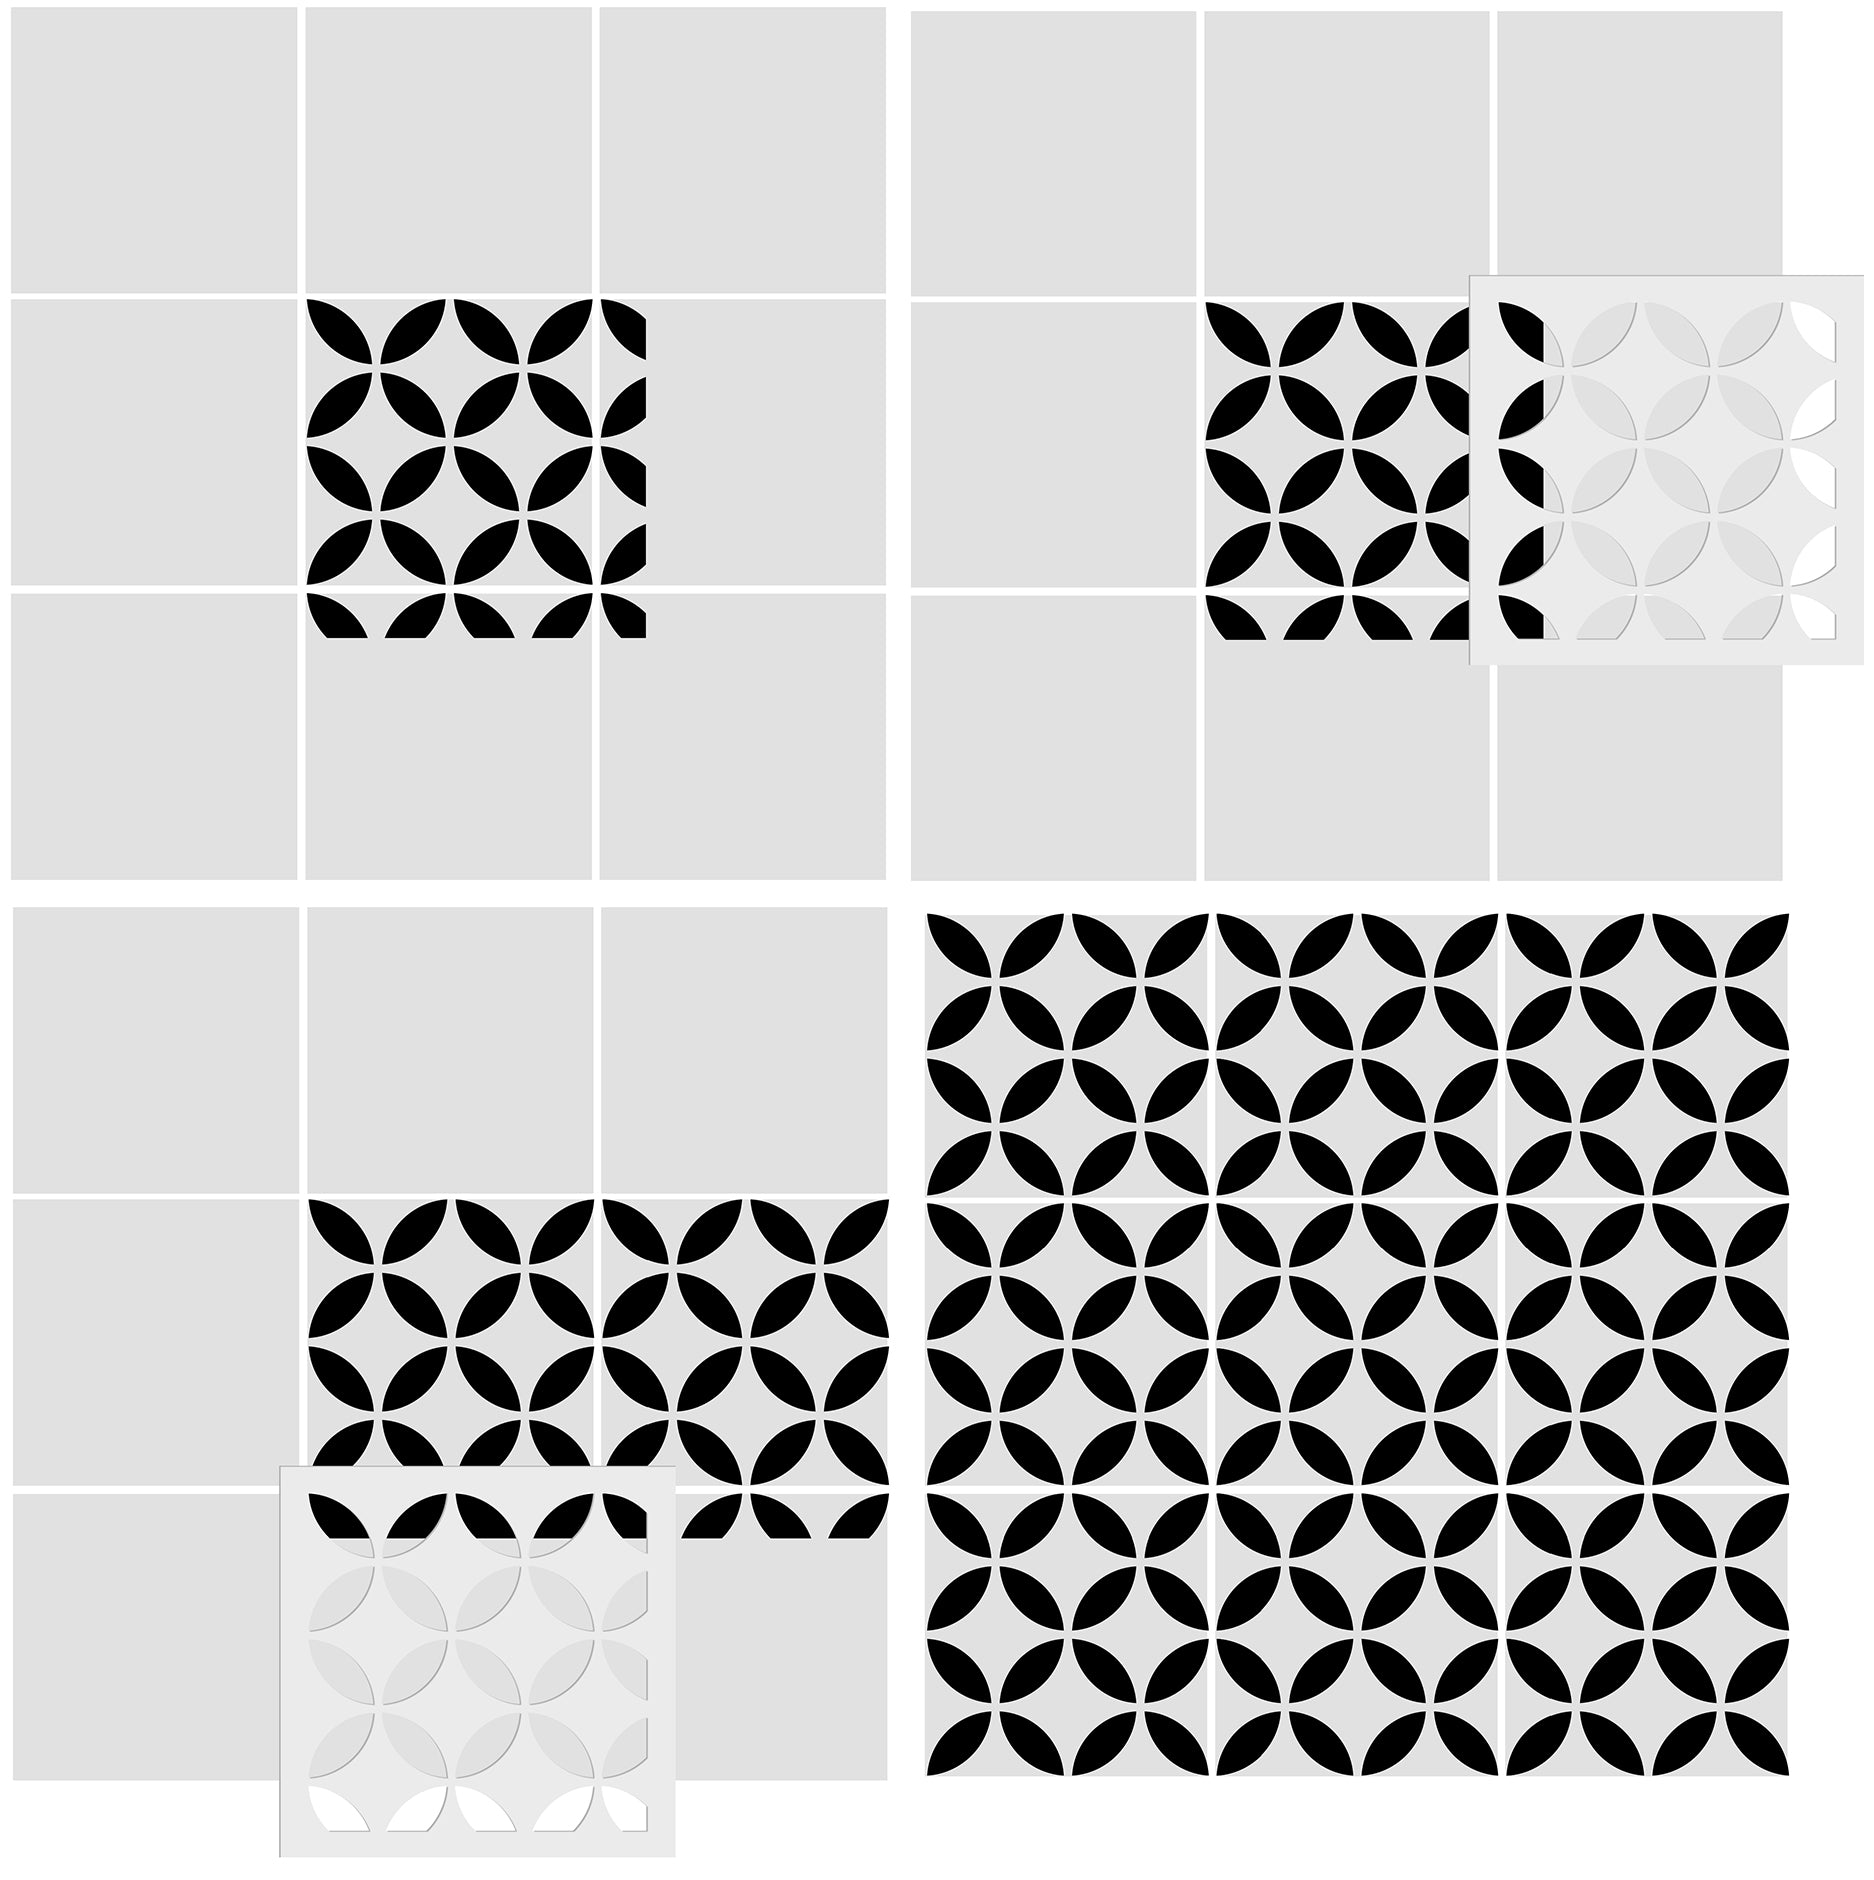
1. Create first repeat with the tile stencil. Notice how the registration marks paint part of the design on the tiles on the right and bottom. These are the registration marks to guide the repeat patter.
2. Use the registration marks to line up the design on the tile to the right.
3. Use the registration marks to line up the design on the tile on the bottom.
4. Repeat steps 2-3 to finish the tile repeat pattern.
But you don’t have to use the tile stencil on tiles…
Nope, the tile stencils work perfectly on walls, furniture, concrete or linoleum floors.

Have questions?
Leave a comment and we'll be happy to answer them for you.
Happy Stenciling.
Comments
Leave a comment